Monday, March 28, 2011

Cookies & Cream Cake


When my sister-in-law asked me to make a cake for her son's first birthday party, I asked her what kind of cake she wanted, and she said she wanted a plane or a dog.  When I clarified that I wanted to know what kind of flavor she wanted, she said that it was up to me.


My husband and I spent some time debating the merits of vanilla and chocolate until it occured to me that it would be fun to combine them.  While marbled cakes are always delicious, I thought that a Chuck-E-Cheese birthday party would be the perfect opportunity to try out something more playful: Cookies & Cream Cake.


In this cake, crushed Oreos (cream and all) are folded into a vanilla cake batter.  When baked, the chocolate cookies soften a bit and the cream melted into the cake.  I actually used Trader Joe's Jojos instead of Oreos - I'd like to say that it's because the absence of hydrogenated oil makes it a healthier alternative to Oreos, but that would be like saying that fidgeting is a better form of exercise than watching T.V.  The real reason is that there are vanilla bean specks in the Jojo cream, which makes it seem fancier to me - probably because I'm too much of a cheapskate to buy my own vanilla beans.  Though adding cookies to cake batter is a small and simple step, it's enough to bump a cake from boring to novel. 

This cake is more dense than cakes made from boxed cake mixes - my husband's family likes their cakes to be "hefty" (in the words of my father-in-law).  However, if you like your cakes to be fluffier, you can take your favorite recipe (or vanilla cake mix) and just fold in some cookies. 


Some notes about the pictures:
- If you would like to make an airplane cake, Wilton has very thorough instructions, as well as stencils for the propeller, wing, and tail.  I did not want to buy their paisley pan, so I just cut the cake into the shape with a serrated knife and brushed away the crumbs with a pastry brush.  Also, I used light blue for the windows instead of black - there's just too much food coloring involved in making black frosting.
- This slice of cake above is a couple days old, so it looks very dried out.  Your cake will look more moist when it is fresh.  I just included this so you could see what it looks like with cookie bits in it.

Cookies & Cream Cake
Adapted from Baking Bites

2 1/4 cups flour
2 teaspoons baking powder
1/4 teaspoon salt
1 1/2 cup sugar
10 tablespoons butter, room temperature
2 teaspoons vanilla extract
2 eggs, room temperature
3/4 cup whole milk
12 crushed Oreos

Preheat oven to 350 degrees.  Grease a 9x13 pan.

In medium bowl, whisk flour, baking powder, and salt.  In large bowl, cream butter and sugar until light and fluffy.  Add vanilla.  Beat in eggs one at a time, fully incorporating the first one before adding the next.

Stir in a third of the flour mixture.  Stir in half of the milk.  Stir in half of the remaining flour mixture.  Stir in the last of the milk.  Stir in the last of the flour mixture.

Bake for 27-32 minutes (depending on your oven and what kind of pan you're using).  Let cool.

Quick Vanilla Buttercream Frosting
(I doubled this to frost and decorate the cake and cookie attachments)

1/2 cup butter, softened
4 cups powdered sugar
1 teaspoon vanilla
1/4 cup milk

Beat butter until fluffy.  Add vanilla, milk, and half of the powdered sugar and beat with an electric mixer until creamy.  Add the rest of the powdered sugar a little bit at a time until it reaches your desired consistency.

(I read that adding the powdered sugar really slowly - a couple tablespoons at a time - helps the frosting to firm up without needing as much sugar.  I have yet to test this technique.)

Monday, March 21, 2011

Coffee Chiffon Cake with Nutella and Bananas


My friends invited David and I over for a crepe party on Pancake Day/Fat Tuesday/Mardi Gras.  Needless to say, I am a fan of any party involving a steady stream of fresh crepes and an extensive topping bar.  I had three crepes that night, playing around with combinations of berries, slivered almonds, lemon juice, powdered sugar, freshly whipped cream, and Nutella.  It was a delicious, delicious night.

It wasn't until two days later that I realized that I had forgotten to make my favorite: Nutella and bananas.

What had I been thinking?  This was a mistake that had to be rectified as soon as possible.  But not with crepes.  With cake.


I wanted to recreate the experience of eating Nutella and banana crepes, but in the form of a cake.  I chose to use thin layers of chiffon cake, for several reasons.  Chiffon cakes are a bit on the eggy side, and are usually not very sweet.  They're not fluffy or dense or crumbly or buttery - they're airy and light, which means that they can balance out the decadence of three layers of Nutella and bananas. 

This cake has a lot going on, so I opted not to frost or top the cake.  If you did want a bit of oomph, for presentation purposes, I think it would be wonderful with a light dusting of powdered sugar or swathed in barely-sweetened whipped cream...though if you want top it with another layer of Nutella and bananas, who am I to stop you?


Coffee Chiffon Cake with Nutella and Bananas
Chiffon cake recipe adapted from Bon Appetit, June 2002

1 1/2 cups cake flour
1 1/4 cups sugar
1 tablespoon baking powder
1/2 teaspoon salt
1/2 cup strong coffee, lukewarm
1/2 cup vegetable oil
5 large eggs, separated
1 tablespoon vanilla extract.

Nutella
4 bananas, sliced about 1/4 inch thick

Preheat the oven to 325 degrees Farenheit.  Butter and flour two 9-inch round cake pans.

Sift flour, 3/4 cup sugar, baking powder and salt into a large bowl.  Using an electric mixer, beat the coffee into the dry ingredients until just combined.  Beat in oil, egg yolks, and vanilla extract.

Using clean, dry beaters, beat egg whites in a medium bowl until soft peaks form.  Gradually add 1/2 cup sugar, beating until stiff but not dry.  Fold whites into batter in three additions.

Bake 30 minutes or until tester comes out clean.  Cool pans on wire cooling racks for ten minutes.  Cut around the cakes and turn out onto racks to cool completely.

Once the cakes are completely cooled, cut each cake in half with a serrated knife or cake cutter.  Place one layer on your serving plate.  Spread an even layer of Nutella onto the cake (make sure to go all the way to the edges) and top with bananas.  Put another layer of cake on top of it and repeat until your cake is finished.


Monday, March 14, 2011

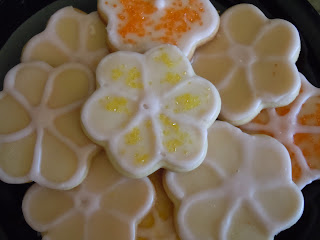
Rolled Sugar Cookies


While I love experimenting with new flavors, I also think that classics are classics for a reason.  The gooey comfort of a chocolate chip cookie, the crisp buttery goodness of shortbreads, the creamy vanilla flavor of sugar cookies...yup, there are many reasons that we return to the classics again and again.


It's really quick to make the dough, and as it needs to be chilled ahead of time, it's really easy to do different parts during several pockets of precious free time.  For example, I spent 15 minutes making the dough one day, another 15 rolling and cutting it the next day, and another 10 minutes just popping it into the oven and baking it later that evening. 


This is probably my favorite sugar cookie recipe - it uses all butter (I hate shortening) and is really easy to roll out.   I think it has the perfect crisp-outside-chewy-inside texture - I'm not a fan of the cakey grocery store sugar cookies. I like it better after it's been sitting around for a couple of days, as it gets softer as time goes by.  I actually transcribed the recipe while watching Martha Stewart (which is weird, because I never watch it).  It's actually pretty entertaining, as her guest was just enamored by Martha and Martha wasn't really interested in her guest's stories of how much she loves her work.  I thought it was kind of funny.  I love Martha's recipes, but I can't be the only one who finds her a bit abrasive, right? 


Rolled Sugar Cookies
Adapted from Martha Stewart

2 cups flour
1/2 teaspoon baking powder
1/4 teaspoon salt
1/2 cup unsalted butter
1 cup sugar
1 egg
1/2 teaspoon vanilla
2 tablespoons milk

In a medium bowl, whisk together the flour, baking powder and salt.

In a large bowl, cream the butter and sugar.  Beat in the egg, vanilla, and milk.  Add the flour mixture and mix until thoroughly combined. 

Divide the dough into two disks, cover in plastic wrap, and chill for at least an hour or up to three days.

When ready to bake, preheat the oven to 350 degrees.

Flour your rolling area and rolling pin.  Roll the dough until 1/8 inch thick.  Cut out shapes with cookie cutters, occasionally dipping them in flour to avoid sticking.  Try to cut out as much as possible at one time, as the dough gets tougher each time you re-roll it.

Bake for about 10 minutes, until lightly golden.  Transfer to wire racks to cool.

Monday, March 7, 2011

Cascaron (Bitsu-Bitsu)


Cascaron is a Filipino dessert that my mom often made for get-togethers when I was growing up.  It's fairly simple to make, though I had a hard time figuring out how to make it for myself as my mom never uses a recipe, and most of her instructions to me were pretty vague.  For example:

Me: How much coconut milk am I supposed to add?
Mom: Oh, you know, you want to put enough, but you don't want to put too much.

Me: How long am I supposed to cook it?
Mom: Oh, I don't know - just be sure to take it out before it explodes.


I eventually figured out that the dough should be similar to cookie dough and that if you cook the dough in medium-high heat until the outsides are golden brown, the insides should be sufficiently cooked.  Thankfully, cascaron is pretty forgiving, and you don't need the exact measurements required in most baking.

So by now, you're probably wondering, "What the heck is cascaron?"  The best way I can explain them is to say that they are like fried coconut mochi balls.  And now you're probably wondering what mochi is.  Mochi is a Japanese cake, traditionally made by pounding rice into a paste and molding it, but can now be made with mochiko flour, which can be found in the Asian section of most grocery stores.  Most people have had it in the context of mochi ice cream, and if you live in Southern California, you've probably seen it as a topping option in most frozen yogurt shops.  It's hard to describe the texture, but I'd say it's denser than a marshmallow, but lighter than gummies, but even then, that doesn't fully capture the essence of mochi.  I guess you'll just have to try it for yourself!  :)


Cascaron

Vegetable oil
1 box mochiko flour (it will look like this)
1 13.5 oz. can coconut milk (I like Chaokoh brand best)
1/2 - 1 cup sweetened shredded coconut
2/3 cup light brown sugar
1/4 cup water

In a wok or wide pot, pour vegetable oil until it's about 3-4 inches deep.  Set the stove to medium-high heat.

Line a pan, tray, or large plate with paper towels

Combine the mochiko and shredded coconut in a large bowl.  Slowly add the coconut milk - you might not need the entire can - and mix until it's the consistency of cookie dough.  If you use the full 1 cup of coconut, you might need to add more liquid - in that case, add some water to the empty coconut milk can, swirl it around a bit so it picks up some of the leftover traces of milk, and slowly add more water to the dough.

Roll the dough into 1-inch balls and fry it in the oil until golden brown.  Don't overcrowd the cascaron - they expand as they cook.  The balls might start to crack, which is okay, just make sure to take them out before they explode ;)  When done, transfer to paper towels to cool.

In a small saucepan, combine the sugar and water.  Cook until it reaches the soft boil stage.  You can test whether it's ready by placing a drop of syrup in cold water - if it retains its shape and is soft, then it's ready.

Place the cascaron in a pan or tray lined with wax paper (I recommend a 9x13 pan).  Drizzle the syrup evenly over the cascaron, and gently stir them around so that they're fully coated.

Note: I tried to do this in a bowl, and it didn't work out to well - the syrup hardened before I could finish mixing them.

Let cool before eating.