Tuesday, November 16, 2010

Brown Butter Apple Cake


Every year, come autumn, my obsession with apples hits me like a ton of bricks.  Last fall, my friends knew that if they came over, they would be greeted with apples in some form of baked good - apple chai cake, apple pie cookies, apple pear crisps, apple oat muffins...my experimentations were endless.  More often than not, though, I fell back on apple chai cake and made it for every potluck, party, and holiday celebration I went to.  While I will always love apple chai cake and I have very fond memories of our time together, I felt suffocated in our monogomous relationship and decided that I wanted to play the field a little bit.    Don't worry - apple chai cake let me know that it will always be around if I need something reliable I can depend on.

But enough about apple chai cake.  This cake involves a cake batter made with brown butter and infused with maple syrup, layered in a loaf pan with chunks of cinnamon-coated apples.  It has the most amazingly tender crumb, and a deep, toasty flavor, thanks to the brown butter (and for all my talk about my apple obsession, probably 25% of my posts involve brown butter.  How's that for an obsession?). 


I made the cake in a loaf pan because I wanted something small that David and I could keep all to ourselves.  However, if you want to share, I suspect that the recipe could be doubled and baked in a 9x13 pan.   The recipe does not make a lot of batter - in fact, when you slide your pan in the oven, you'll probably think that it will bake into the flattest cake in the history of ever.  But have no fear - even though the batter is sticky and dense, it rises beautifully up around the apples and results in the aforementioned tender crumb. 


Brown Butter Apple Cake

3 apples
2 teaspoons cinnamon
2 1/2 tablespoons sugar

1 1/4 cups flour, sifted (sift before measuring!)
1 1/2 teaspoons baking powder
1/4 teaspoon salt
1/2 cup (1 stick) butter
3/4 cup sugar
1/8 cup maple syrup
1/8 cup milk
1 1/2 teaspoons vanilla extract
2 eggs

Preheat oven to 350 degrees.  Grease a loaf pan.

Brown the butter in a small saucepan - click here for a tutorial.  Set aside to cool.

Peel, core, and chop apples into 1-inch chunks.  Toss with cinnamon and sugar.  Set aside.

In a large bowl, combine flour, baking powder, and salt.

Whisk together the brown butter, sugar, maple syrup, milk, and vanilla.  Stir the wet ingredients into the dry ingredients.  Stir in eggs one at a time.

Pour half of the batter into the loaf pan.  Scatter half of the apples over the batter.  Pour the rest of the batter over the apples, and top with the rest of the apples - drizzle the juices from the apples over the top.  Bake for 1 1/2 hours, or until a toothpick comes out clean.

Tuesday, November 2, 2010

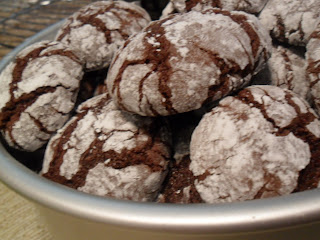
Chocolate Crinkle Cookies


These are pretty much brownies in the form of a cookie.  I love making these because the dough is extremely simple to make and one recipe makes a huge batch of cookies.  While these cookies are fantastic as-is, I think next time I'll try stirring in some mini chocolate chips for extra chocolate-y gooey goodness.

I don't remember where I got this recipe from - I found it in a pile of index cards tucked away in an envelope in a cabinet above our sink.  I tend to write down recipes on scrap pieces of paper and leave them lying around the house for David to find and and eventually put away, until I want to make the recipe again and tear the house apart looking for it.  I think I need a better recipe filing system.  Chocolate Crinkle Cookies seems like one of those universal cookies that everyone makes, like sugar cookies or shortbread cookies, where there's a basic recipe that everyone uses, so I might not need to give anyone credit for this, but just in case: if this recipe looks identical to one in a cookbook, website, or blog, let me know so I can give the creator credit.


Chocolate Crinkle Cookies

1 cup unsweetened cocoa powder
2 cups white sugar
1/2 cup vegetable oil
4 eggs
2 teaspoons vanilla extract
2 cups all-purpose flour
2 teaspoons baking powder
1/2 teaspoon salt
1/2 cup confectioners’ sugar

In a medium bowl, whisk the cocoa powder, white sugar, and vegetable oil together. Beat in eggs one at a time, then stir in the vanilla extract. In another bowl, combine the flour, baking powder, and salt; stir into the cocoa mixture. Cover dough, and chill for at least 4 hours.

Preheat oven to 350 degrees Farenheit. Line cookie sheets with parchment paper or silicone baking mat. Scoop the dough with a tablespoon, and roll into balls with your palms. It helps to lightly oil your palms with vegetable oil, so that the dough doesn't stick to your hands so much.  Word to the wise - do not spray your hands with Pam, because you'll definitely be able to taste it in the finished product.  Roll each ball of dough in powdered sugar before placing them onto the prepared cookie sheets.

Bake for 10 to 12 minutes. Let stand on the cookie sheet for a minute before transferring to wire racks to cool.

Friday, October 22, 2010

Double Apple Bundt Cake


I love fall.  Even though the leaves here don't change color, it still feels different - the dropping temperatures, the morning mist, the smell of wet pavement, the promise of pumpkin-spice lattes, the Christmas decorations that go up in stores the moment Halloween ends - every moment feels festive.


I think part of it also has to do with the anticipation of holidays that involve being in community with each other, whether it's going door-to-door, as with trick-or-treating and Christmas caroling, or gathering around the dinner table for a ridiculously heavy meal.  And this cake is perfect for any occasion or visit that may arise: it's quick and easy (in other words, perfect for my busy grad school schedule), feeds a small crowd, and with it's assortment of spices and the inclusion of apples in two incarnations, it tastes like autumn.  As a bonus, it tastes better the day after it's baked (though it's very tasty the day of, too).


This cake includes fresh, shredded apples and apple butter - the recipe says that either plain or spiced apple butter is fine.  I used an apple butter that was spiced with cinnamon and cloves, and I loved the extra flavor it gave the cake.  The shredded apples kind of melted into the cake, so you couldn't really tell they were in there, which disappointed me a little - I thought there would be small bits of apple in each bite.  Still, though, I can't complain - after all, this cake makes it possible to get the cinnamon-apple goodness of homemade apple pie in a fraction of the time.


Double Apple Bundt Cake
Adapted from Dorie Greenspan

2 cups flour
2 teaspoons baking powder
1/2 teapoon baking soda
1/2 teaspoon ground cinnamon
1/4 teaspoon freshly grated (or ground) nutmeg
1/4 teaspoon ground ginger
1/4 teaspoon salt
1 1/4 sticks unsalted butter, at room temperature
1 1/2 cups sugar
2 large eggs
1 cup store-bought apple butter (I used Tropical brand)
2 medium apples, peeled, cored and grated
1 1/2 cups pecans, chopped

Preheat oven to 350 degrees Farenheit.  Butter and flour a 9- to 10-inch Bundt pan (unless it's silicone - then there's no need).

Whisk together flour, baking powder, baking soda, spices, and salt

In a large bowl, beat the butter and sugar on medium speed with a hand mixer, scraping the bowl as needed, for 3 minutes, or until the mixture is smooth, thick and pale.  Add the eggs one at a time, beating for 1 minute after each addition.  Reduce the mixer speed to low and beat in the apple butter.  Add the grated apple and mix to completely blend.  Don't worry if the batter looks curdled - that's normal.  Add the dry ingredients, mixing only until they disappear into the batter.  Using a rubber spatula, fold in the pecans.

Pour the batter into the Bundt pan and smooth the top of the batter with the spatula.  Bake for 50-55 minutes.  Transfer the pan to a rack to cool for 5 minutes before unmolding and cooling the cake to room temperature.

Dust with powdered sugar before serving.

Store at room temperature.  Wrap well with plastic. 

Sunday, October 17, 2010

Wedding Cake Part 3: Putting it Together

When preparing to make this cake, I got advice from lots of how-to articles, blog posts, comments on blog posts, and a friend of a friend.  I kind of picked and chose the bits of instruction that was most convenient from each one.

Note: Blogger is being kind of wonky at the moment, so there are certain pictures that I wanted to show you that didn't get on here.  I'll hopefully come back and add them later.

Assembling the Cake

1. White Chocolate Shavings
I used a pound of Callebaut white chocolate to make shavings to cover the cake. At first, the shavings were very skinny and looked like toothpicks. It took me a while to figure out how to make the big rose-petal-like shavings - as it turned out, the chocolate was too cold. I warmed the edges of the chocolate with my hands before shaving off a thin sliver of chocolate with a kitchen knife - I was worried that warming them using a method other than body heat would result in too-soft or melted chocolate. I ended up liking the combination of large and small shavings on the cake.


2. Cake boards

The top cake tier sat on a round cake board that was slightly smaller than its bottom.  The bottom tier sat on a cake board that was slightly larger.  In hindsight, it would have been a good idea to check with the bride and groom to see if they would be providing a cake stand, but as it was, I sat the bottom cake board directly on the table and covered the parts that jutted out with icing and white chocolate shavings.

3. Wooden and plastic dowels

I inserted four wooden dowels into the bottom tier before setting the top tier on it - this prevents the cake from collapsing into itself.  I first inserted a dowel into the bottom tier, marked it about 1/8 inch from the top of the cake, and removed it from the cake.  I then cut all four dowels at the mark.  I used wooden dowels, and they were very, very difficult to cut.  I unfortunately couldn't find plastic dowels, but I heard that plastic straws could also work in a pinch.


4. Cake Assembly Kit

I assembled the cake at the reception site - luckily, both tiers fit side-by-side inside my cake carrier.  I knew that the frosting would definitely get messed up during transportation, so I brought a kit with me so I could make all necessary repairs.  I brought piping tips, piping/ziploc bags, paper towels, an offset spatula, a butter knife (which is what I usually use to repair small sections of cake), scissors, extra icing, and a really big spatula, which I used to lift the top tier from the cake carrier to the top of the cake. 

After stacking the two tiers, I frosted over the damaged parts and piped little pearls in between the tiers (to cover the small gap) and at the bottom of the cake (to cover the board).  Then I covered the whole thing in white chocolate shavings.


Saturday, September 18, 2010

Wedding Cake: Part Two - The Frosting


Holy cow, is this post way overdue.  But!  I have an excuse:  school and work has been kicking my butt.  Fortunately, I am now on a part-time work schedule, so juggling everything should be more manageable from now on. 

But enough about me.  On to the frosting! 

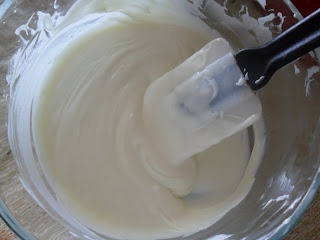
As I mentioned before, I made a white chocolate cream cheese frosting, as the groom is a big fan of white chocolate.  When making the frosting, it is very important that all of the ingredients are at room temperature.  If the cream cheese and butter are too cold, the white chocolate will harden into chunks.  If the white chocolate is too warm, it will melt the cream cheese and butter.

Instead of making a separate batch of frosting for the strawberry filling, I simply mixed some strawberry puree into some reserved white chocolate frosting.  It ended up being very tasty.


I chose to use white chocolate chips in the frosting, figuring that the same oils (which are used instead of cocoa butter) that help the chips retain their shape when baked would give the frosting added stability.  I'm not sure if success of the frosting could be attributed to the chocolate chips, as I haven't tried making the frosting with real white chocolate, but as written, this frosting holds up amazingly well.  I wouldn't recommend chilling the frosting in the fridge, as it will become way too hard to spread and could possibly curdle if you try to beat it afterwards.

I love this frosting because it's very creamy and not too sweet.  The cream cheese flavor is very mellow and allows the vanilla notes of the white chocolate to shine. 


White Chocolate Cream Cheese Frosting

28 ounces (3 1/2 blocks) cream cheese, softened
26 tablespoons (3 sticks + 2 tablespoons) butter, softened
24 ounces white chocolate chips
4 cups powdered sugar

Melt the white chocolate chips, using either a double-boiler or a microwave.  If using the microwave method, stir the chocolate well after each 15-second interval.  Let cool to room temperature.

Beat the cream cheese and butter until well-combined and fluffy.  Add the white chocolate and beat until thoroughly combined.  Add the powdered sugar one cup at a time, mixing well after each addition.  Set aside two cups of the frosting for the strawberry filling.

Strawberry White Chocolate Frosting

2 cups white chocolate cream cheese frosting
1/4 cup strawberry puree

Mix the puree into the frosting until thoroughly combined.

Monday, September 6, 2010

Wedding Cake: Part One - The Cake


Well, friends, I did it.  I made a wedding cake.  Granted, it was small, but it was a wedding cake nonetheless.  And let me tell you, I did a LOT of research, even making a practice tier the week before.

The bride and groom sent me a picture of a six-inch cake perched on top of an 8-inch cake, swathed in white buttercream that had been swirled and swooped.  They told me that they wanted the cake to be in those dimensions, but covered in white chocolate shavings.  The bride told me that she likes chocolate and raspberry and that the groom likes white chocolate and strawberry.  I decided to make a chocolate cake with white chocolate cream cheese frosting.  In between the cake layers, I spread a thin layer raspberry preserves and a thick layer of strawberry white chocolate buttercream.  Then, I coated the whole thing in almost a pound of Callebaut white chocolate shavings.


It turned out great.  I was surprised at how smoothly everything went, though I think that most of it could be attributed to the cake recipe I chose.  During my two weeks of research, I read Smitten Kitchen's blog posts about her experience making a wedding cake, and she highly recommended a Chocolate Butter Cake recipe from the Sky High cookbook.  When I did my trial run, I tightly wrapped the cakes and left them in the fridge for two days.  Then I covered it in frosting and served it to my husband and friend, and we were delighted to find that the cake hadn't dried out a bit.  Then, the cake sat on the table for 5 days, at the end of which the cake was still insanely moist, dense, and fudgy.  Furthermore, the batter is insanely quick and easy to make.  Also!  In the middle of my cake-making marathon,  I ran out of wax paper with which to line the bottom of the pan, so I made sure to grease the pan well and prayed that the bottom wouldn't stick.  Unfortunately, a couple chunks of cake stayed stuck to the bottom of the pan when I turned the cake over.  However, I took the pieces of cake, stuck them back in their respective gaps, tightly wrapped the cakes and prayed that the chunks would miraculously glue itself back in the cake, and you know what?  It did!


Because I'm still pretty tired from a weekend of cake-making (and because I have quite a bit of homework to catch up on), I'm dividing my experience into three parts, the first of which is the cake recipe.

Chocolate Butter Cake
Adapted from Sky High: Irresistible Triple-Layer Cakes
Makes a 3-layer 8-inch round cake and a 3-layer 6-inch round cake

4 cups cake flour
4 cups sugar
2 cups unsweetened cocoa powder
4 teaspoons baking soda
1 teaspoon ground cinnamon
4 sticks (one pound) salted butter, room temperature
2 cups buttermilk
4 eggs
2 cups freshly-brewed coffee

Preheat oven to 350 degrees Farenheit.  Grease cake pans, line bottom with wax paper, and butter it.  Lightly coat with cocoa powder.

In large mixing bowl, combine flour, sugar, cocoa, baking soda, and cinnamon.  Blend on low for 30 seconds.  Add butter and buttermilk.  Blend on low until moistened.  Raise speed to medium and beat until light and fluffy, 2-3 minutes.  Make sure to mix way at the bottom of the bowl, to ensure that no bits of dry ingredients sneak away unmixed.

Whisk coffee and eggs together.  Add the coffee mixture to the batter in three additions, scraping down sides of bowls and beating only until blended after each addition.

Divide batter among pans: each 6-inch layer gets 2 cups and each 8-inch layer gets 3 1/2 cups.  Bake the 6-inch layers for 25-30 minutes and the 8-inch layers for 30-35 minutes, or until toothpick comes out clean.  Carefully turn them out on wire racks and let them cook completely.  Remove paper liners when cool.

If assembling cakes later, tightly wrap the cake layers in 2 (or 3) layers of cling wrap and store in the refrigerator.

Monday, August 23, 2010

Strawberry Mini Cupcakes


I honestly don't know where my head has been lately.

There's been a lot of changes going on lately.  First of all, I'm going back to school!  I'll be getting my Masters in Education with an emphasis in school counseling, and I'm very excited.  Secondly, I quit my job!  I'm in the midst of my last week of work, and while it will feel weird to not be working (actually, I will soon be working for free as an intern at schools), I'm looking forward to this transition.  Lastly, I am on my way to becoming a domestic goddess.  This whole loss-of-income thing has been freaking me out, and I've been budgeting, creating spreadsheets, uncluttering, rearranging furniture, menu-planning, scanning weekly sale ads, and clipping coupons like crazy. 


Unfortunately, this newfound household organization has caused some disorganization in other areas of my life, namely in my ability to keep track of recipes, especially since I scribble recipes and measurements on Post-it notes as they enter my head.  I spent half an hour tonight searching high and low for my recipe for these Strawberry Mini Cupcakes, to no avail, then figured, heck, I created this recipe, so  I should be able to remember it, right?  Thank goodness my previously organized self had typed the recipe into a rough draft, because I don't think I would have gotten it right.  I probably should have checked my list of drafts before I tore the apartment apart.  By the way, if this post seems a little, oh, I don't know...rushed?  It's probably because I've gotten back into "school-mode" and I've been creating imaginary deadlines for myself, because if I don't blog about these cupcakes tonight, it probably won't get done for another three weeks, due to the fact that I'm making a wedding cake.  By the way, did I mention that I'm making a wedding cake for the weekend after my first week of school?  If in the coming weeks it seems that I've dropped off the face of the earth, that is why.  That will also be why this post will probably make no sense, because really, proofreading?  What is that?  And who has time for it?


But in all seriousness, these mini cupcakes are awesome.  Sometimes, strawberry-flavored treats can taste artificial, but these were made with ripe summer berries, and the proof is definitely in the pudding...err, cupcake.  They're not too sweet, so you can go crazy with the strawberry buttercream.  I had eaten 1/4 of the cupcakes before I got to the frosting stage, and I didn't quite have enough to pile the frosting high on all of them, the way shown in the pictures - I had to smear a thin layer on the last few.  The recipe as written would probably be enough to smear a healthy layer of frosting on all cupcakes, but if you want to pile the frosting high, you'll have to double it.  Which, you know what?  Do it.  After all, what's a cupcake without frosting?


Strawberry Mini Cupcakes
Makes 18-20 cupcakes

3/4 cup flour
1/2 cup sugar
3/4 teaspoon baking powder
1/4 cup (1/2 stick) butter, softened
1/3 cup pureed strawberries
1 egg
1/8 cup milk

Preheat the oven to 350 degrees Farenheit.  Line a mini muffin pan.

Cream the butter and sugar together until combined.  Stir in the pureed strawberries until light and fluffy.  In a small bowl, whisk together the flour and baking soda, and add half of the mixture into the strawberry batter.  Stir until combined.  Add the egg and milk into the batter; stir until combined.  Add the rest of the dry ingredients and stir until combined.

Divide the batter into the mini cupcake liners, filling each one about 3/4 full.  Bake for 15 minutes.

Strawberry Buttercream Frosting

1/4 (1/2 stick) cup butter, room temperature
3 tablespoons strawberry puree
3/4 - 1 cup powdered sugar

Stir together the butter and strawberry puree until combined.  Beating continuously, slowly add powdered sugar until the frosting reaches your desired consistency.  Spread onto the top of your cupcakes.

Thursday, August 19, 2010

Hawaiian-Style Fried Rice

No, there's no pineapple or ham.


What's your favorite comfort food?  Usually the words "comfort food" conjures up images of pot roast, mac and cheese, and apple pie.  I've found that my favorite comfort foods are very different from that of my friends who grew up on the "mainland."  I seek chicken katsu, breaded in panko and fried until golden brown.  Banana lumpia, crispy on the outside, gooey on the inside, and coated in sticky melted sugar.  And best of all, my mom's fried rice, which she made many Sunday mornings for breakfast.  Yes, breakfast.

Fried rice is one of those dishes that everyone in Hawaii claims that their parents make best.  I'm no exception.  I was thinking about it a couple months ago, when I was making fried rice for dinner (my mom always finds it odd when I make it for dinner instead of breakfast) for my friend, Lauren Carmen San Diego, who interestingly enough, claims that I make the best fried rice.  I omitted the veggies I usually add (because Lauren hates veggies), and it occurred to me that maybe everyone likes their parents' fried rice best because their parents only included the things they like.  For example, my uncle always made his with onions and chives, which I abhorred, while my mom made hers with Spanish chorizo, which I love.  All this to say that fried rice is so extremely customizable, and as long as you include things that you love and omit things that you hate, you're going to love it.

I will say that there is one thing that will take your fried rice from good to great: BACON.  This is what makes fried rice "Hawaiian-style," because nobody in Hawaii makes their fried rice without bacon (that I know of, at least).  Sure, if you're a vegetarian or you don't eat pork, you don't have to add it, but oh my goodness, you are missing out on the salty, smoky flavor that it imparts on the rest of the ingredients.  In fact, my mom always drained the bacon renderings, added the rest of the ingredients, then drizzled a couple tablespoons back into the wok.  I always thought that the secret ingredient was the oyster sauce, but I ran out once and just used soy sauce with a pinch of garlic salt and ground ginger, and I didn't even notice the difference.

Fried rice is a great way to use up the leftovers in your fridge.  The last time I made it, I added the last bits of meat from a leftover rotisserie chicken, the last of my arugula, and about 1/3 of a cup of corn left from a dinner party with friends.  My mom likes to go all-out - we once ate fried rice with leftover steak and shrimp.  It was glorious.  While adding leftover meat and vegetables is optional, using leftover rice is essential.  Using rice that has gotten a little hard makes it easier to mix with the rest of the ingredients, and not to worry, it softens during the cooking process.  Conversely, using just-cooked rice will result in mushy fried rice, and trust me - nobody likes mushy fried rice. 


I like a 1:1 rice to meat/vegetable ratio, but if you like your fried rice with more, well, rice, feel free to make that adjustment.  The recipe below isn't necessarily my favorite version - it's just the version I have pictures of.  Again, adjustments and substitutions are encouraged.  (For the record, my favorite version involves bacon, Spanish chorizo, julienned carrots and celery, and a fried egg on top.  Yes, it's very healthy.)  I never use a recipe, so these are approximations.

Hawaiian-Style Fried Rice
Serves 4, or, spread out over a couple of days, one very hungry Alli

3 cups leftover cooked rice, cold
1 package bacon, coursely chopped
2/3 cup shredded leftover rotisserie chicken
2/3 cup julienned carrots
4 ounces arugula
1/3 cup corn
3 tablespoons oyster sauce
5 tablespoons soy sauce

Heat a wok to medium-high heat.  Cook the bacon until very crispy.  Using a slotted spoon, transfer the bacon to another bowl and scoop out as much of the bacon renderings as you can (though leave a couple teaspoons in the wok to cook the rest of the stuff in).

Add the carrots to the wok and cook for three minutes, stirring frequently.  Add the chicken, corn, and arugula.  Cook until the chicken is heated through and the arugula is barely wilted.  Add the bacon back in.  Add the rice - the cold rice will have stuck together, so crumble it with your hands over the meat and vegetables.  Stir well - make sure that the meat and vegetables are evenly distributed throughout the rice.  Drizzle a couple tablespoons of the bacon fat back over the rice and stir well, until evenly distributed.

In a small bowl, mix together the oyster sauce and soy sauce.  Spoon the mixture over the fried rice a little at a time, stirring well and tasting in between, to make sure you don't add too much of the soy sauce mixture.  When it's flavored to your liking, the fried rice is done.

For maximum presentation points and tastiness, tightly pack the fried rice into a small bowl and unmold onto a plate.  Drape a sunny-side-up egg on top.  Yum!

Monday, August 16, 2010

Brown Butter Plum Cake


The past few Thursdays, the moment I arrive at the farmers market, I gravitate towards the same stand to buy a basket of their insanely good plums.  I've never finished a basket, but this week, I had decided to make Dorie Greenspan's Dimply Plum Cake.  It had been on my list of things to make for about a year, and I had only been waiting for plums to be in season.

However, when I saw that Elissa of 17 and Baking had chosen brown butter as the theme of this month's Sugar High Friday, I knew that I wanted to 1) participate, and 2) make a dessert somehow involving both plums and brown butter.

My idea came to me pretty quicky: a Plum Upside-Down Brown Butter Pecan Cake.  For obvious reasons, I've shortened the name. 

I don't mean to brag, but this was a delicious cake.  The cake was tender and moist. and the ground pecans really highlighted the nutty notes of the brown butter without overpowering it.  The plums added a touch of tartness to an otherwise sweet cake, and the bright red slices looked very pretty embedded into the top of the cake (especially if you wait for it to cool completely before unmolding it, unlike me, who lost all the plums in the center of the cake and futilely tried to make it look nice again).  I think the cake would be amazing with apple or pear slices in the fall, but I also think that it would be the perfect simple everyday cake without the fruit, topped only with a dusting of powdered sugar.

I stored the cake in the fridge overnight, and was pleased to find that the cake was still moist the next morning, if a tad bit denser.  However, as it warmed to room temperature, the cake regained its tender crumb.


Brown Butter Plum Cake (or Plum Upside-Down Brown Butter Pecan Cake)

10 tablespoons butter, cut into pieces
1 cup flour
1/2 cup ground pecans (about a heaping 1/2 cup of pecan halves)
1 teaspoon baking powder
1/2 cup milk
1/2 cup sugar
1/2 cup + 3 tablespoons brown sugar, divided
1/4 teaspoon vanilla extract
8 small or 4 medium plums, cut into slices about 1/4 inch thick.

Preheat the oven to 350 degrees Farenheit.  Grease a 9-inch round cake pan.

In a medium saucepan, melt the butter and cook until it becomes amber in color (click here for a tutorial on how to brown butter).  Pour most of it into a bowl or glass measuring cup and set aside to cool - leave a couple tablespoons of browned butter in the pot.  Add the plum slices and 3 tablespoons brown sugar, and toss until completely coated.  Arrange the plum slices in the bottom of the cake pan in concentric circles.

In a food processor, grind the pecans, adding a tablespoon or so of flour so that it doesn't become a nut butter.  In a medium bowl, combine the flour, ground pecans, baking powder, granulated sugar, and a 1/2 cup of brown sugar.  Whisk to combine.

In a measuring cup, whisk together the milk, eggs, vanilla extract, and cooled brown butter until combined.  Pour into the dry ingredients and mix until just combined. Pour the cake batter into the pan, gently spreading it evenly over the plums.

Bake for 25-30 minutes.  Let cool for 20 minutes, then invert the cake onto a plate.  If some of the plum slices stick to the cake pan, just arrange them onto the cake again.

Keep refrigerated up to 3 days.

Friday, August 13, 2010

Salted Caramel Brownies


This is probably the best mistake I've ever made.

These were supposed to be Salted Caramel Swirl Brownies.  But, as it is apt to do, the caramel sauce liquified in the heat of the oven.   To be honest, I had a feeling it wouldn't swirl (though I hoped it would magically defy science), and I luckily thought to use unsalted butter as a precaution.  As you can see in the picture above, all the caramel rose to the top of the brownies, forming a pool of sticky goodness on the surface and infusing the brownie batter with its glorious burnt sugar flavor on the way.

These brownies came out perfectly.  While they are a bit of a melty mess right out of the oven, once they cool, they are dense, fudgy, amazingly chocolate-y, and in the words of David, "fantastilicious".  The edges were a bit crispier than they normally would be, due to the caramel bubbling up around the edges, but David and I enjoyed it.  I kept the brownies in the fridge to keep the caramel firm, and I have to say, these brownies were amazing on the second day, straight out of the fridge.  On the third day, David said, "These brownies get better every day.  Like wine, or something." 


Salted Caramel Brownies
Adapted from David Lebovitz

1 cup (2 sticks) unsalted butter, cut into pieces
12 ounces semisweet chocolate, finely chopped
1/2 cup unsweetened cocoa powder
6 large eggs
2 cups sugar
2 teaspoons vanilla extract
2 cups flour

Preheat the oven to 350 degrees.

Line a 9x13 inch with a long sheet of aluminum foil that covers the bottom and reaches up the sides. Grease the bottom and sides of the foil with a bit of butter or non-stick spray.

Melt the butter in a medium saucepan. Add the chocolate pieces and stir constantly over very low heat until the chocolate is melted. Remove from heat and whisk in the cocoa powder until smooth. Add in the eggs one at a time, then stir in the sugar, vanilla, then the flour.

Scrape half of the batter into the prepared pan.

Drop one-third of the caramel, evenly spaced, over the brownie batter, then drag a knife through to swirl it slightly. Spread the remaining brownie batter over, then drop spoonfuls of the remaining caramel in dollops over the top of the brownie batter. Use a knife to swirl the caramel slightly.

Bake for 50 minutes.  Remove from the oven and cool completely.

Wednesday, August 11, 2010

Salted Caramel Sauce


I love salted caramel.  Love it.  I can't even wax poetic about it, because it reduces me to a blabbering idiot.

I made a salted caramel sauce.  I have plans for it.  Yummy plans.  But you'll have to wait til the next post to see what those plans are.


I made a double recipe of the sauce.  I wanted to have enough to pour over ice cream.  Yum.  But first I need to buy ice cream.  I might just eat the sauce straight out of its container with a spoon.


But in all seriousness, I highly recommend measuring all the ingredients and having them ready to go before you start making the sauce, because caramel demands your utmost attention.  I've forgotten to pre-measure my ingredients before, and it has resulted in burnt caramel, which besides the whole inedible caramel thing, also involves layers of burnt sugar on the bottom on your saucepan, so trust me on this: burnt caramel = no bueno.


The best utensil to use when making caramel is a wooden spoon.  It doesn't conduct heat, which prevents crystallization, and sugar doesn't stick to it as much as it would to metal utensils.  (I don't remember where I learned that.  Probably from Alton Brown). Most caramel sauce recipes tell you to let the sugar boil without disturbing it.  When I have done this, it has resulted in burnt caramel.  However, when you stir continuously, the sugar takes forever to turn into caramel.  I recommend frequently (but not continuously) scraping the bottom of the pot with a wooden spoon, just to make sure the sugar doesn't get stuck to the bottom and burn.  One more tip, courtesy of the Baked cookbook: When you're done with the sauce, boil some water in the pot with your utensils inside - it will dissolve the sticky, stuck-on sugar.  It will make clean-up way easier.  You're welcome.

Salted Caramel Sauce
Adapted from Food and Wine
(Makes 3 cups of caramel)

2 cups sugar
1/2 cup water
2 tablespoons light corn syrup
1 1/2 cup heavy cream
8 tablespoons unsalted butter
3 teaspoons flaky sea salt (The recipe recommends a grey salt, such as Maldon, but my dad gave me some Hawaiian salt the last time I visited.  Don't use table salt!  It's way too strong!)

In a medium saucepan, combine sugar, water, and corn syrup.  Bring the mixture to a boil.  Using a wet pastry brush, wash down crysals on the side of the pan.  Boil over high heat, frequently scraping the bottom of the pot with a wooden spoon, until it turns a deep amber color, about 6 minutes (it took me about 15, but I was very worried about burning it).  Remove the saucepan from heat and carefully whisk in cream, butter, and salt.  The caramel will probably seize when you stir in the cream, but just keep stirring (return the pot to low heat if necessary) and the clumps will eventually dissolve.  Let caramel cool to room temperature.

The caramel can be refrigerated for up to two weeks.  Rewarm the sauce before serving.

Monday, August 9, 2010

Cherry Plum Pecan Crisp


It seems that I spent all winter making mental lists of all the treats I would make this summer, all involving some combination of cherries, berries, and plums. However, I usually end up eating them all before I get the chance to experiment with them.  The fruit this season have been so sweet and perfect, that it seemed like a crime to do anything but eat them just the way they are.


I noticed yesterday that I had a carton of cherries on the brink of going bad.  Wanting to use them, I decided to make a cherry crisp.  I've heard of people using paper clips or chopsticks to pit cherries, but I couldn't figure it out.  I ended up cutting each cherry in half around the pit and prying them out.  It seemed to work fine, but if I ever come across a recipe that necessitates leaving the cherry whole, I might have to invest in one of these.


I didn't quite have enough cherries for even a little individual crisp, so I supplemented them with a couple of tiny plums that I had gotten at the farmers market last week.  I made a topping using some pecans that my friend gave me this weekend, and the combination of the sweet cherries, the slightly tart plums, and the nutty, crunchy pecan topping made me wish that summer would last forever.

I made a lot of topping because I wanted to have some crunch in each bite.  If you like your crisps with a higher fruit to topping ratio, you can halve the topping quantities.  I made the crisp in a 16-ounce ramekin, though I think that dividing them between two 8-ounce ramekins would make for a really cute presentation.  You could share with a friend/roommate/significant other...but I chose to eat mine all by myself.


Cherry Plum Pecan Crisp

Filling
1 cup cherries, pitted and halved
2 small (or one large) plum, pitted and sliced
2 teaspoons cornstarch
2 tablespoons brown sugar

Preheat the oven to 375 degrees.  Combine all the ingredients in a 16-ounce ramekin.  Toss gently until the fruit is evenly coated.

Topping
1/8 cup pecan halves
2 tablespoons flour
2 tablespoons brown sugar
2 tablespoons butter, cold, cut into pieces

Combine the pecans, flour, and brown sugar in a food processor.  Pulse until the most of the pecans are ground, with a few larger pieces.  Add the butter, and pulse until the mixture resembles wet sand and the pieces of butter are no larger than a pea.

Sprinkle the topping over the filling.  Bake for 20 minutes, or until the topping is golden brown and the fruit juices are bubbling around the edges.  Let cool slightly; serve warm.

Friday, August 6, 2010

15-Minute Meal: Mahimahi with Brown-Sugar Soy Glaze


I had ambitious plans for this mahimahi.  My parents have had a newspaper clipping of a complicated recipe for macadamia-nut-coconut-crusted mahimahi posted on their fridge for two years now.  I ask them about it every time I visit, and they haven't made it yet.  I wanted to give it a try.

Unfortunately, this week has just been one of those weeks.  (You can tell, because it doesn't get more generic than that.)  I had a few deadlines at work, and every single piece of office equipment decided to break down on me this week (unfortunately, that is not hyperbole).  David and I have been in the middle of reorganizing the apartment (more on that later), which is tiring, but also very rewarding.  But I knew that I couldn't let the mahimahi go bad, so I decided to go with a much simpler (but still very tasty) recipe.

David thought the dinner seemed pretty elaborate, but in all honesty, it was super quick and easy.  I served the fish with rice and lightly steamed broccoli, which are two sides that require little preparation or attention.  The sauce is only composed of three things (well, four, but I decided to omit the scallions): brown sugar, soy sauce, and lemon juice.  I was apprehensive about the lemon juice at first, but I really liked it - it gave the glaze a really bright flavor without making it too citrusy.  I forgot to halve the sauce (since the original recipe called for four mahimahi instead of two), but David and I both liked the extra sauce - we swished our rice and broccoli around in it, which made them extra-tasty!

Mahimahi with Brown-Sugar Soy Glaze

3 tablespoons packed brown sugar
2 1/2 tablespoons soy sauce
3 tablespoons fresh lemon juice
2 6-oz pieces of mahimahi filet
1/4 teaspoon salt
1 1/2 tablespoons vegetable oil

Pat fish dry and sprinkle with salt. Heat oil in a 12-inch nonstick skillet over moderately high heat until hot but not smoking, then cook fish on 1 side until browned, 3 to 4 minutes. Turn fish over and brown 1 minute.


While the fish is cooking, combine the brown sugar, soy sauce, and lemon juice.  Stir until the sugar has dissolved.  Pour over the fish and simmer, covered, until fish is cooked through, about 4 minutes.  Transfer fish with a slotted spatula to a platter.

Boil the sauce, stirring occasionally, until the glaze is very thick and has reduced to less than 1/4 cup.  Spoon glaze over fish.

Wednesday, August 4, 2010

Strawberry Spinach Salad with Fried Tofu and Goat Cheese


Yes, I know what you're probably thinking.  Fried tofu sounds weird (though fried goat cheese sounds delicious, at least to me).  I've been craving chicken katsu lately, but didn't have any chicken breasts around, and due to my competition with myself to make the grocery bill lower every week, did not feel like shelling out for them.  Instead, I decided to cook some tofu katsu-style, which involves dredging it in flour, dipping it in egg, and coating it in panko (Japanese bread crumbs).  And because things that are fried are not the healthiest things to be eating, I paired it with a salad (because when you eat healthy things with unhealthy things, they cancel each other out, right?).  And lest things get too healthy, I decided to fry the goat cheese as well. 

As it turns out, David eats a lot more spinach when he gets something crispy and cheesy in every bite.  In my opinion, the salad tastes best when you get a little bit of everything in each forkful.  I really liked using the soft tofu for this salad - the crispy outside combined with the custardy inside was delicious - but medium or firm would work well, too.  I would avoid using silken tofu, though - it's too fragile to stand up to the coating and frying process.


Strawberry Spinach Salad with Fried Tofu and Goat Cheese
Serves 2

1/2 cup strawberries, hulled and quartered
5 ounces spinach
2 ounces goat cheese (half of a 4-oz log), sliced into 4 rounds
1/4 of a block of soft tofu, cut into 4 squares (about an inch thick)
1/4 cup flour
1 egg
3/4 cup panko
1 tablespoon balsamic vinegar, divided
4 tablespoons olive oil, divided
1/8 teaspoon salt
1/8 teaspoon pepper
Handful of pine nuts, toasted

In a large bowl, combine the strawberries with half a tablespoon of balsamic vinegar.  Toss gently to coat evenly, and let sit for 5-10 minutes.

In a small bowl, stir together the other half tablespoon of balsamic vinegar, 2 tablespoons of olive oil, salt, and pepper.  Set aside.

In a medium skillet, heat the other two tablespoons of olive oil.  Put the flour, egg, and panko in three separate, shallow bowls.  Lightly season the flour with salt and pepper; stir to combine.  Lightly whisk the egg.  Dredge each square of tofu in flour mixture, dip it in the egg, and coat in the panko.  Place the coated tofu in the skillet.  Repeat with the goat cheese.  Cook the tofu and goat cheese until golden brown on both sides. 

While the tofu and goat cheese are cooking, combine the spinach, vinaigrette, and the pine nuts in the bowl with the strawberries.  Toss until everything is evenly coated.  Distribute onto two plates.  Place two tofu squares and two goat cheese rounds on the top of each salad.