Monday, June 13, 2011

Strawberry - White Chocolate Mousse Tart


Reasons why this post will be short:
1 - 12 page paper on community interventions for adjudicated youth
1 - 12 page paper on the effects of parental involvement on the academic achievement of ELL students
4 - powerpoint presentations
6 - hours of site visits
2 - school counselor interviews with accompanying summaries in the form of papers
2 - wedding showers
2 - baby showers
1- impending out-of-town wedding that I will be participating in
1 - insane Lego wedding cake that I need to make for another wedding
2 - finals in the six days in between the aforementioned wedding and the aforementioned cake
3- weeks to do it all

Reasons why I made this tart:
1. My husband is a big fan of white chocolate. 
2. Strawberries were on sale for a mind-bogglingly cheap price. 
3. I am a big fan of strawberries.  
4. We had friends coming over.

Reasons why you should make this tart
1. It looks pretty.
2. It is easy to make.
3. It is yummy.  Very, very yummy.

Seriously.  What could be better than two pounds of sweet, juicy strawberries nestled on a cloud of vanilla-scented white chocolate mousse, which itself is nestled inside what is essentially an enormous shortbread cookie receptacle of goodness?

It's a rhetorical question.  Don't try to answer it.

That is all.


Strawberry - White Chocolate Mousse Tart

Tart Crust
Adapted from Baking: From My Home to Yours

1 1/2 cups flour
1/2 cup powdered sugar
9 tablespoons butter (very cold and cut into small pieces)
1 large egg yolk

Combine flour and powdered sugar in a bowl, stirring to combine. Cut the butter into the dry ingredients (you can do this with your hands) until the mixture resembles wet sand (the pieces of butter should be no larger than a pea). Stir the yolk to break it up, and add a little of the time, stirring it in with a spatula until the dough forms clumps and curds. Knead the dough lightly just to incorporate any dry ingredients.

Press the dough evenly over the bottom and up the sides of a 9-inch tart pan. You might want to save a little bit of dough to patch any cracks after the crust is baked. Freeze the crust for at least 30 minutes before before baking.

When ready to bake, preheat the oven to 375 degrees Farenheit. Butter the shiny side of some aluminum foil and fit the foil tightly against each crust, butter side down. Put the tart pans on a baking sheet and bake for 15 minutes. Carefully removie the foil. If the crusts have puffed, press it down gently with the back of a spoon. Bake for another 5 minutes until it is firm and golden brown. Cool the crust to room temperature before filling.


White Chocolate Mousse Filling

4 egg yolks
1/4 cup sugar
1 cup whole milk
1 teaspoon vanilla extract
1 tablespoon powdered gelatin, sprinkled over 3 tablespoons water
1 cup heavy cream
12 ounces white chocolate

In a medium bowl, over simmering water, melt the white chocolate until smooth. Remove from heat and let cool to room temperature.

In large bowl, whisk egg yolks with sugar until very light.
In a large saucepan, bring milk to boil over medium heat. Slowly pour milk over yolks, whisking quickly constantly so the eggs don't curdle. Pour mixture back into saucepan over medium heat and cook until the mixture coats the back of the spoon, mixing continuously. Add softened gelatin and stir until completely melted into the mixture. Stir in the vanilla. Let cool to room temperature.

Stir in the white chocolate and mix until thoroughly combined.

Whip the heavy cream to soft peaks and fold into the cooled white chocolate mixture.

Strawberry Topping
2 pounds strawberries, rinsed and halved.
2 tablespoons lemon juice
2 tablespoons sugar

Gently toss the berries in the lemon juice and sugar, until evenly coated. Let macerate at room temperature for 30 minutes.

To Assemble the Tarts

Coat the inside of each tart with some melted chocolate - this will prevent the crust from getting soggy.  Let the chocolate harden.  Spoon the white chocolate mousse and gently spread it to the edges.  Top the tart with strawberries.  Refrigerate for one hour before serving.

Tuesday, May 31, 2011

Lemon-Raspberry Tarts


When my friend Lauren Carmen San Diego came to visit this spring, she brought the sunshine with her.  It was glorious.  Summer had given us a sneak preview, and we were determined to make the most of it.  We went to the beach and attempted to frolic in the waves, until we realized the water was too cold and we were better off sunbathing.  We wore sundresses and flip flops, and in my case, yellow plastic sunglasses.  We walked around in the sunshine with ice cream cones in our hands.  We went out for Mexican food and ate at a picnic table outside as the sun began to set. 


And we ate these lemon-raspberry tarts, which tastes like an edible bowl of crisp buttery goodness filled with summery sunshine. Looking back on it, the lemon cream might be too soft and runny to put into a tart shell, but it is so, so yummy. I had a large bowl of unused lemon cream in a bowl in my fridge, and every 10 minutes or so, I would scoop a huge spoonful of lemon cream straight from the fridge just to satiate my lemony lust. Seriously. It is really, really good.

In short: make these tarts.  Or at least make the lemon cream.  If you're too lazy to make tart shells, just layer the lemon cream and raspberries in a glass to make a parfait.  Actually, that sounds really good.  I think I'm going to go do that now.


Lemon Raspberry Tarts

Tart Crust

Adapted from Baking: From My Home to Yours
1 1/2 cups flour
1/2 cup powdered sugar
9 tablespoons butter (very cold and cut into small pieces)
1 large egg yolk

Combine flour and powdered sugar in a bowl, stirring to combine. Cut the butter into the dry ingredients (you can do this with your hands) until the mixture resembles wet sand (the pieces of butter should be no larger than a pea). Stir the yolk to break it up, and add a little of the time, stirring it in with a spatula until the dough forms clumps and curds. Knead the dough lightly just to incorporate any dry ingredients.
Divide the dough into six portions.  Press each portion of dough evenly over the bottom and up the sides of 4-inch tart pans. You might want to save a little bit of dough to patch any cracks after the crust is baked. Freeze the crust for at least 30 minutes before before baking.

When ready to bake, preheat the oven to 375 degrees Farenheit. Butter the shiny side of some aluminum foil and fit the foil tightly against each crust, butter side down. Put the tart pans on a baking sheet and bake for 15 minutes. Carefully removie the foil. If the crusts have puffed, press it down gently with the back of a spoon. Bake for another 5 minutes until it is firm and golden brown. Cool the crust to room temperature before filling.


Lemon Cream
Adapted from Tartelette

1/2 cup sugar
1/4 cup cornstarch
zest of one lemon
3 egg yolks
2 cups whole milk
1/2 cup lemon juice

In a large bowl, whisk together sugar, cornstarch, lemon zest, and egg yolks until pale.  Slowly add the milk and whisk well.  Bring the mixture to a boil in a heavy-bottomed saucepan placed over high heat.  Reduce the heat and simmer til thick.  Remove from heat and slowly add lemon juice.  Return to medium-low heat and let cool. 

Raspberry Topping

2 pints raspberries
2 tablespoons lemon juice
2 tablespoons sugar

Gently toss the berries in lemon juice and sugar until evenly coated.  Let macerate at room temperature for 30 minutes.

To Assemble Tarts

Coat the inside of each tart shell with some melted white chocolate.  Let the chocolate harden.  Divide the lemon cream among the tart shells.  Place plastic wrap over the top to prevent skin from forming and refrigerate for at least one hour. 

When ready to serve, top with the raspberries.

Monday, May 23, 2011

Lentil Shepherd's Pie


I know this may seem shocking, but between the pounds of butter, sugar, and eggs that I go through each week, I occasionally make dishes involving vegetables.  Vegetables that are not hidden in muffins.  Because as adorable as those floating blob-people were in Wall-E, I do not aspire to be one of them.

Despite the fact that this involves 7 - 8 different kinds of vegetables (depending on whether you consider potatoes to be vegetables), it was really, really tasty.  It even tasted meaty.  I think it was the Worcesterschire sauce.  Or the mushrooms.  So add the mushrooms, even if you don't like them.  David hates mushrooms, and he had no idea they were in there.  Though I guess he does, now.

This dish is ridiculously filling, so even if it looks like there are four servings, there are actually probably enough servings to last two people an entire week.  I am not kidding.  As delicious as this was, by the time David and I finished all the leftovers, we never wanted to see another lentil again.  So if there are only two of you, and you're not big eaters, do yourself a favor and halve this recipe.  


Lentil Shepherd's Pie
Adapted from Ezra Pound Cake

2 teaspoons olive oil
1 onion, chopped finely
4 ounces (1 1/2 cups) shiitake mushrooms, chopped (I used baby bellas.)
1 zucchini, diced small ( 1 1/2 cups)
3 cloves garlic, minced (I skipped this, as I am not a garlic person)
1/2 teaspoon oregano
2 teaspoons thyme
1/2 teaspoon salt
Freshly ground black pepper, to taste
1 cup carrots (about 3), peeled and diced small
3/4 cup du Puy lentils (also called French lentils), rinsed (I used green lentils.)
3 cups vegetable broth
1 tablespoon Worcestershire sauce 
1/2 cup frozen corn
1/2 cup frozen peas
1 recipe Cauliflower Mashed Potatoes (recipe below)

Heat the oil in a 4-quart pot or Dutch oven over medium-high heat. Add the onions, and saute them until translucent, about 4 minutes.

Add the mushrooms, zucchini, garlic, tarragon, thyme, salt and pepper. Saute for 5 minutes.

Add the carrots, lentils and broth. Cover and bring to a boil, then lower the heat to a simmer and cook for about 25 minutes, stirring every once in a while.

By this point, the lentils should be tender, and most of the broth should be absorbed. (If that hasn’t happened, then keep the pot covered and simmer the lentils a while longer. Conversely, if the broth has evaporated and the lentils are not soft, then add a bit of water and simmer.)

When the lentils are soft, stir in the Worcestershire sauce, corn and peas. Let the mixture sit off the heat for 10 minutes or so for maximum flavor. Taste and adjust the seasonings.

To Serve: Spoon a cup of Cauliflower Mashed Potatoes into a bowl, and top it with a cup of lentils.

Cauliflower Mashed Potatoes

2 russet potatoes, cut into 3/4-inch pieces (about 1 1/2 pounds)
1/2 head cauliflower, cut into florets (1 pound, or about 3 cups)
1 tablespoon olive oil
2 to 4 tablespoons vegetable broth
1/2 teaspoon salt
Freshly ground black pepper, to taste

Place the potatoes in a 4-quart pot, and fill it with enough cold water to cover them, making sure there are about 4 inches of extra water on top (for when you add the cauliflower). Bring the potatoes to a boil.

Once the water is boiling, add the cauliflower, and lower the heat to a simmer. Cook for about 15 minutes, until the potatoes and cauliflower are tender.

Drain them in a colander, return them to the pot, and use a potato masher to mash them a bit.

Add the oil, 2 tablespoons of broth, and the salt and pepper. Mash a bit more. Use a fork to make sure all the seasoning are mixed well.

If needed, add another 2 tablespoons of broth. Taste, and adjust seasonings. Serve warm.

Monday, May 16, 2011

Carrot Apple Muffins


As much as I love eating desserts (and trust me, I love to eat desserts), I find the process of baking just as enjoyable as the end product.  In fact, I often get the urge to bake without even knowing what it is that I want to bake.  I usually end up scrounging through my pantry and refrigerator for inspiration.  On Thursday night, my refrigerator was pretty bare, but I did end up finding a few carrots and an apple.  I figured that between those two ingredients, I could make a delicious and healthy breakfast muffin.

While these muffins are delicious fresh out of the oven, I enjoyed them even more the next few mornings, when I toasted them before slathering them in butter and honey.  Have you tried toasting muffins before?  You should.  It's delicious.

Some notes: I had shredded the carrots coursely, and I think next time I would shred them more fine - the carrots were still a little crunchy right out of the oven, though they softened after sitting for a couple of days.  Also, if you want, you can pack the muffins even more full of healthy goodness by adding dried fruit or nuts.


Carrot Apple Muffins
Adapted from Gourmet, 1998

1 cup AP flour
1 cup whole wheat flour
2 teaspoons baking soda
2 teaspoons cinnamon
1/4 teaspoon salt
1/2 cup sugar
1/2 cup brown sugar
2 cups shredded carrots
1/4 cup sweetened shredded coconut
3 large eggs
1 cup corn oil
2 teaspoons vanilla
1 large apple, shredded

Preheat the oven to 350 degrees Farenheit.  Grease a 12-cup muffin tin.

In a large bowl, Combine flours, baking soda, cinnamon, and salt.  Whisk in both kinds of sugars.  Add the carrots and coconut; stir until completely combined.

In a medium bowl, combine the eggs, oil, vanilla, and shredded apples.  Add the apple mixture to the carrot mixture and stir until just combined.

Divide equally between the muffin cups.  Bake for 15-20 minutes. 

Cool muffins for 5 minutes in the tin before turning out onto the racks to cool completely.  Muffins keep in an airtight container at room temperature for 5 days.

Tuesday, May 10, 2011

S'mores Cookie Bars


It pains me to admit this, but I have never been one for the great outdoors.  For my family, camping meant going to a cabin in the mountains, complete with electricity, a fully functioning kitchen, and furniture...though I still slept in a sleeping bag, if that counts for anything.  During the day, we went hiking in the forests, had picnics in parks, picked plums from trees, and, if we were brave enough, swam in the ice-cold fresh water streams.  At night, we retreated back to the cabin, played board games, and made s'mores, not over a campfire, but in the cabin's fireplace.  I have to admit, I never got my marshmallow in between the graham crackers and chocolate, as I usually ate my charred, gooey marshmallows straight off the stick I toasted them on.

I haven't been camping in a while, in any sense of the word.  One day, David and I will go camping for real, with tents and bug spray and the whole sh'bang.  But until then, I am content to recreate camping memories with these s'more cookie bars.

These are best when cooled but still slightly warm - if it's still too hot when you slice into it, the filling oozes out, but if you let it cool too much, the chocolate re-hardens. 


S'more Cookie Bars
Adapted from Baking Bites

1 cup butter
1/2 cup brown sugar
1 cup sugar
2 large eggs
2 teaspoons vanilla extract
2 2/3 cups flour
1 1/2 cups graham cracker crumbs
2 teaspoons baking powder
1/2 teaspoon salt
4 king-sized chocolate bars
3 cups marshmallow fluff

Preheat oven to 350 degrees Farenheit.  Grease a 9 x 13 pan.

In a large bowl, cream butter and sugar until light.  Beat in eggs and vanilla.

In a small bowl, whisk flour, graham cracker crumbs, baking powder, and salt.  Add to butter mixture and mix until combined.  Divide dough in half.

Press half of the dough into an even layer on the bottom of the prepared pan.  Place chocolate bars over the dough.  Spread marshmallow fluff over the chocolate.  Place remaining dough in a single layer on top of the fluff.

Bake for 30 - 35 minutes, until lightly browned.

Cool before cutting into bars.

Monday, April 25, 2011

Blackberry Banana Muffins


I cannot study at home.  It's impossible.  There are way too many distractions.  I might want to go back to bed and take a nap.  I might pull up a movie on Netflix to watch instantly.  I might wander over to the kitchen and spend my entire morning making cookies. 

No, it is much better for me to walk around the corner to my favorite cafe, with its incredibly creamy chai lattes and assortment of brownies.  Or one and a half more blocks from there to another amazing cafe, with their on-site roasted coffee, madeleines, and Nutella rolls.  Yes, these places are much more conducive to studying.


While the second cafe definitely wins out in the breakfast pastry category, their muffins leave something to be desired (and I'm sure this goes for all bakery muffins).  I was initially excited to try their Blackberry Banana Muffins, but the muffins weren't very banana-y, and the blackberries had all sunk to the bottom, creating a hole in the middle of the muffin.  Fortunately, those two problems are pretty easy to fix, and I set about making my own version of the muffins.


These muffins were a success.  They were best fresh out of the oven, of course, but they also made a pretty tasty breakfast the following two days.  I lightly coated the blackberries in flour before adding them to the muffin batter to prevent them from sinking, and it definitely did the trick - needless to say, muffins are much better when they're whole instead of hollow.  The whole wheat flour added a slightly nutty flavor to the muffins, as well as an excuse to eat them for breakfast.  I sprinkled the tops of the muffins with turbinado sugar before baking them, and I loved the extra crunch and sweetness it contributed. 

Not a fan of blackberries?  Neither is David.  I substituted the blackberries in half of the muffins for a combination of white and semisweet chocolate chips, and he gave them two big thumbs up.


Blackberry Banana Muffins
Makes 12 muffins

1 cup all-purpose flour
1/2 cup whole wheat flour
1/2 cup sugar
1 1/2 teaspoons baking powder
1/2 teaspoon baking soda
1/4 teaspoon salt
3 large bananas
1 large egg, room temperature
1/3 cup unsalted butter, melted and cooled
1/4 cup milk
1 teaspoon vanilla extract
6 ounces blackberries (defrost if using frozen)

Turbinado sugar (optional)

Preheat oven to 350 degrees.  Grease or line a 12-muffin tin.

Whisk together the all-purpose flour, whole wheat flour, sugar, baking powder, baking soda, and salt in a large bowl.  Set aside.

In a medium bowl, mash the bananas.  Mix in the egg, melted butter, milk, and vanilla extract.  Stir the banana mixture into the dry ingredients until just combined (don't overmix). 

Lightly coat the blackberries in flour and gently fold them into the muffin batter.  Divide equally among the muffin tins.  Sprinkle each one generously with the turbinado sugar.

Bake until the tops are pale golden, about 28-32 minutes.  Transfer to rack to cool.

Monday, April 18, 2011

Churros con Chocolate


In my junior year of college, I studied abroad in Granada, Spain.  From my first day there, I heard about churros con chocolate, but didn't know what they looked like or where to get them.  I went to bakeries and asked for churros con chocolate, but they didn't have any.  I checked the coffee shops, only to find out that the coffee shops were actually primarily bars.  Halfway through my semester, I finally found some at a place called Cafe Futbol.  The treat was not, as I had originally suspected, like Mexican churros filled with chocolate.  They were more donut-like, smooth instead of rigid, unadorned and accompanied by the thick Spanish hot chocolate that you were supposed to dip it into.  It was love at first bite.  My friends and I went there about once every other week to eat churros con chocolate, though we started going more and more during finals as we realized that we would soon have to leave everything in Spain behind.

Once we returned to San Diego, I searched for Spanish restaurants and cafes in the area that might have churros con chocolate, to no avail.  It didn't occur to me to try making them myself until three years later, when I was searching for a recipe for my host mom's chorizo lentil soup and stumbled across a recipe for churros con chocolate.  I excitedly tried the recipe, trying to improvise and use a cookie press, as I didn't have any large frosting tips.  It did not turn out so good.

Cafe Futbol churros


I shelved the idea in favor of new projects, until a tapas bar opened near my apartment and reminded me of my favorite Spanish treat.  I decided to try again, using a different recipe and a large coupler instead of a star tip.

These churros are smaller, but taste just like I remember - crispy on the outside, soft and custardy on the inside.  The hot chocolate is rich and thick - almost like a cross between fudge sauce and pudding.  Served together, they're as warm and comforting as cookies and milk.


Churros con Chocolate
Adapted from Chocolateria San Gines, Madrid, Spain

Churros:
8 cups vegetable oil
1 cup water
1/2 cup butter
1/4 teaspoon salt
1 cup flour
3 eggs
1/4 cup sugar

Heat oil to 360 degrees Farenheit.

Heat water, butter, and salt to rolling boil in a 3 quart saucepan.  Add flour and stirr vigorously over low heat until it forms a ball (about 1 minute).  Remove from heat.

Beat eggs until smooth, and add to saucepan while continuously stirring mixture.

Spoon dough into piping bag.  Squeeze 4-inch strips into oil.  Fry for 3 or 4 minutes until golden brown, turning once halfway through.  Drain on paper towels.

Spanish Hot Chocolate

2 ounces dark chocolate
1 cup milk
1 1/2 teaspoons cornstarch
2 tablespoons sugar

Place chocolate and half of milk in saucepan and cook over very low heat, stirring, until chocolate has melted.  Dissolve cornstarch and sugar into remaining milk and whisk into the chocolate.  Cook on low heat, whisking constantly, until chocolate thickens (it will take about 5 minutes).  Remove from heat and whisk til smooth; pour into mugs.

Monday, April 11, 2011

Cinnamon Sugar Pull-Apart Bread


The only compliment/encouragment I ever got from my piano teacher is that I'm very "stick-to-itive".  I'm not sure if she thought that was a good or bad thing.  At any rate, my stick-to-itiveness came in handy when making this cinnamon sugar pull-apart bread.

I've never worked with yeast before.  I've always been a bit scared, as there are certain things you need to do when yeast is involved, like kneading, rising, and waiting, and those are three things that I am not very good at.  Plus, there are so many opportunities for things to go wrong.  For example, what if while the dough was rising, I left my apartment to run an errand and got distracted by a butterfly and chased it all around town?  The dough would just sit there, and it would keep rising and rising, getting bigger and bigger, until the confines of my apartment complex couldn't contain it anymore, and it would become so big that it gained sentience like The Blob and it would plop its blobby self around the city proclaiming, "Feed me!  Glluuurgh!" and it would just completely smother the entirety of California.  I do not want to be responsible for the destruction of civilization, no siree. 


Still, I knew that I had to conquer my fear of screwing up if I ever wanted to eat this cinnamon sugar pull-apart bread.  Seriously - how could you not persevere when the end goal is this browned-butter-and-cinnamon-sugar-slathered loaf that you pull apart, sheet by delicious sheet?  I love peeling things, like dried glue off of fingernails and sunburnt skin off my shoulder.  So this?  It's like having a sheet of scratch-and-sniff stickers that you can eat.  Plus, if cats can knead, then I should be able to do it, too.  Right?

As it turns out, maybe not.  After letting the dough rise for the first time, I tried kneading the dough, following the instructions given in an eHow article.  After a while, I realized that I still had no idea what I was doing.  It said to turn the dough, but was I supposed to make a quarter turn?  Turn it halfway around?  Flip it over?  And it said to push the dough forward with the palm of my hand, but how far forward?  So confusing!  Then I got the brilliant idea of checking YouTube, and found this very helpful video from Epicurious.  Note to self - check to see if  there's an Epicurious tutorial before trying anything new again. 


As I kneaded the dough, I realized that the dough wasn't becoming elastic, like the tutorial said it would.  Then it occured to me that maybe when the instructions told me to let the dough rise somewhere warm, it meant a place more warm and humid than my San Diego living room.  And you're probably thinking how I could possibly not notice that the dough hadn't risen, but like I said, I've never done this before!  I wasn't sure how it was supposed to look.  I was just glad that it hadn't gained sentience yet.

After reading some internet comment boards, I decided to bring some water to a boil in the microwave, and afterwards, stuck the bowl of dough in with the steaming cup of water, and let it rise for another hour.


So at this point, I had already messed up quite a bit.  I might have overkneaded the dough.  I added the last of the flour before the dough had a chance to rise.  I let the dough sit around for an hour at room temperature.  I wasn't sure if I had completely messed it up or not, but I figured I could try going through with the bread anyways, and try again if it didn't turn out.

I ended up rolling out the dough to 22 inches instead of 20 inches.  Instead of having pretty little squares to stack into the pan, I had crooked rectangles.  Oh well.


I let it rise again, using the same microwave technique.  I got distracted on the phone with my mom and let it rise a little too long.  I forgot to preheat the oven.  The loaf sat for a while before going in.

In the end?  It tasted the way it was supposed to taste (delicious).  Did it look pretty?  Not really.  Did I care?  Definitely not.  After all, it's not the outside, but the warm, soft, cinnamony, buttery inside that counts.


Cinnamon Sugar Pull-Apart Bread
Adapted from Joy the Baker

Dough

2 3/4 cups + 2 tablespoons AP flour
1/4 cup sugar
2 1/4 teaspoons (1 envelope) active dry yeast
1/2 teaspoon salt
2 ounces unsalted butter (half stick)
1/3 cup whole milk
1/4 cup water
2 large eggs, room temperature
1 teaspoon vanilla extract

Filling

1 cup sugar
2 teaspoons ground cinnamon
1/2 teaspoon ground nutmeg
2 ounces unsalted butter, melted until browned

In a large mixing bowl, whisk together 2 cups flour, sugar, yeast, and salt.  Set aside.

Whisk together eggs and set aside.

In a small saucepan, heat the milk and butter until the butter has melted.  Remove from heat and add water and vanilla extract.  Let stand until the temperature of the mixture reduces to 115 - 125 degrees Farenheit.

Pour the milk mixture into the flour mixture and mix with a spatula.  Add the eggs and mix until the eggs are incorporated.  Add 3/4 cup flour and mix with spatula until incorporated.  The dough will be sticky.

Transfer the dough to a large, greased bowl.  Cover with plastic wrap and a clean kitchen towel.  Place in a warm space and let rise until doubled in size, about one hour.

*The dough can be risen then refrigerated overnight for use in the morning.  If you do this, allow the dough to rest at room temperature for about 30 minutes before continuing to the next step.

While the dough rises, whisk together the sugar, cinnamon, and nutmeg for the filling.  Set aside.  Melt 2 ounces of butter until browned.  Set aside.  Grease and flour a 9x5x3 inch loaf pan.  Set aside.

Once the dough has risen, transfer to a lightly-floured surface.  Deflate the dough and knead the last 2 tablespoons of flour into the dough.  The dough won't be sticky anymore, and when you poke the dough with your finger, the indentation will stay.  Cover with a clean kitchen towel and let rest for 5 minutes. 

Use a rolling pin to roll the dough out to 12 inches tall and 20 inches long.  Use a pastry brush the spread the browned butter across all the dough.  Sprinkle the cinnamon-sugar mixture evenly over the dough.  Yes, it's a lot of sugar.  Yes, you should use it all.

Slice the dough vertically into six equally-sized strips.  Stack the strips on top of each other.  Slice the stack into six again.  You'll have six stacks of squares.  Layer the dough squares on the loaf pan like dominos.  Cover the pan with a kitchen towel and put it in a warm place to rise again for 30-45 minutes, or almost doubled in size.

While it's rising, preheat the oven to 350 degrees Farenheit.  When the dough has finished rising, place the loaf in the oven and bake for 30-35 minutes, until the top is very golden brown.

Remove from the oven and let the loaf rest for 20-30 minutes.  Run a butter knife around the edge of the pan to loosen the bread and invert it onto a clean plate.  Place your serving plate on top of the upside-down loaf and carefully flip it over again, so it's right side up.

The loaf can be wrapped in plastic and kept at room temperature for up to two days.  But it probably won't last that long.

Monday, April 4, 2011

Puppy Cake Pops


Remember how in my last post, I mentioned that my sister-in-law asked me to make either an airplane or puppy cake for my nephew's first birthday?  And remember how I cut up a 9x13 cake into the shape of a plane, leaving me with quite a bit of scraps and crumbs?

Well, with the leftover cake scraps, I made some adorable puppy cake pops!

I mixed the cookies & cream cake crumbs with about 1/4 of a canister of store-bought cream cheese frosting (I have no idea why, but store-bought seems to do a better job of holding them together).  I rolled them into quarter-size balls.  I dipped the lollipop sticks in candy coating before sticking them into the cake balls so that the cake wouldn't fall off the sticks.

Once you have your cake pops, here's how you make your puppies:

Puppy Cake Pops
Adapted from Cake Pops

Ingredients:

Peanut butter candy melts
Chocolate candy melts
Candy writers (dark brown)
Mini M&Ms
Lifesavers (I used the gummi ones, because I didn't want the toddlers to choke on the hard ones)

Tools

Edible ink pen
Sharpie
Clear plastic spoons
Squeeze bottle
Styrofoam block

Dip the cake pops in melted peanut butter candy coating - dunk straight down, lift staight up, and allow the coating to drip back into the bowl.  Stick the pop into the styrofoam block to dry.

To make the ears:
-Draw an elongated tear drop with a Sharpie on the back of the clear plastic spoon.
-Flip spoon over.  On the inside of the spoon, trace and fill in the tear drop with either the candy writer of a squeeze bottle filled with melted chocolate candy coating. 
- Place in the freezer a few minutes to set
- Remove and pop the ears off the spoon and store in a dry place until ready to use

To make the nose:
- Cut a brown mini M&M in half
OR
- Use a candy writer to draw a nose on wax paper.  Let dry and set aside until ready to use.

To assemble:
- Use the candy writer or melted chocolate coating as glue to attach the pieces to the pops.
- Place a drop of chocolate on the back of the pre-made nose and attach to the pop.
- Use the edible ink pen to draw the eyes and mouth
- Use glue method to attach the ears and the Lifesaver collars.
- Allow the pops to dry before serving.

Advice from Alli:
- I actually had a very difficult time with the squeeze bottle method - the candy kept solidifying after a couple minutes in the bottle, blocking off the opening. I would recommend trying the candy writers. Try to make the ears thick - mine were too thin, which made it difficult to "glue" them to the pops.
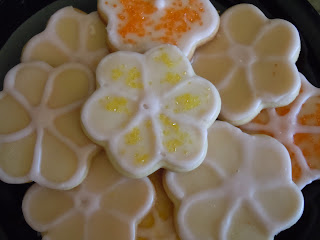
- Do not refrigerate the pops before assembling and decorating.  The chocolate "glue" would harden before I got the chance to add the appendages.  Furthermore, the condensation on the pops made it hard to draw the eyes and mouth.
- If it's a warm day and you need to transport them somewhere, try putting them in a cooler.  The day of the party was very sunny, and the ears and collars ended up melting off the puppies on the way!

Monday, March 28, 2011

Cookies & Cream Cake


When my sister-in-law asked me to make a cake for her son's first birthday party, I asked her what kind of cake she wanted, and she said she wanted a plane or a dog.  When I clarified that I wanted to know what kind of flavor she wanted, she said that it was up to me.


My husband and I spent some time debating the merits of vanilla and chocolate until it occured to me that it would be fun to combine them.  While marbled cakes are always delicious, I thought that a Chuck-E-Cheese birthday party would be the perfect opportunity to try out something more playful: Cookies & Cream Cake.


In this cake, crushed Oreos (cream and all) are folded into a vanilla cake batter.  When baked, the chocolate cookies soften a bit and the cream melted into the cake.  I actually used Trader Joe's Jojos instead of Oreos - I'd like to say that it's because the absence of hydrogenated oil makes it a healthier alternative to Oreos, but that would be like saying that fidgeting is a better form of exercise than watching T.V.  The real reason is that there are vanilla bean specks in the Jojo cream, which makes it seem fancier to me - probably because I'm too much of a cheapskate to buy my own vanilla beans.  Though adding cookies to cake batter is a small and simple step, it's enough to bump a cake from boring to novel. 

This cake is more dense than cakes made from boxed cake mixes - my husband's family likes their cakes to be "hefty" (in the words of my father-in-law).  However, if you like your cakes to be fluffier, you can take your favorite recipe (or vanilla cake mix) and just fold in some cookies. 


Some notes about the pictures:
- If you would like to make an airplane cake, Wilton has very thorough instructions, as well as stencils for the propeller, wing, and tail.  I did not want to buy their paisley pan, so I just cut the cake into the shape with a serrated knife and brushed away the crumbs with a pastry brush.  Also, I used light blue for the windows instead of black - there's just too much food coloring involved in making black frosting.
- This slice of cake above is a couple days old, so it looks very dried out.  Your cake will look more moist when it is fresh.  I just included this so you could see what it looks like with cookie bits in it.

Cookies & Cream Cake
Adapted from Baking Bites

2 1/4 cups flour
2 teaspoons baking powder
1/4 teaspoon salt
1 1/2 cup sugar
10 tablespoons butter, room temperature
2 teaspoons vanilla extract
2 eggs, room temperature
3/4 cup whole milk
12 crushed Oreos

Preheat oven to 350 degrees.  Grease a 9x13 pan.

In medium bowl, whisk flour, baking powder, and salt.  In large bowl, cream butter and sugar until light and fluffy.  Add vanilla.  Beat in eggs one at a time, fully incorporating the first one before adding the next.

Stir in a third of the flour mixture.  Stir in half of the milk.  Stir in half of the remaining flour mixture.  Stir in the last of the milk.  Stir in the last of the flour mixture.

Bake for 27-32 minutes (depending on your oven and what kind of pan you're using).  Let cool.

Quick Vanilla Buttercream Frosting
(I doubled this to frost and decorate the cake and cookie attachments)

1/2 cup butter, softened
4 cups powdered sugar
1 teaspoon vanilla
1/4 cup milk

Beat butter until fluffy.  Add vanilla, milk, and half of the powdered sugar and beat with an electric mixer until creamy.  Add the rest of the powdered sugar a little bit at a time until it reaches your desired consistency.

(I read that adding the powdered sugar really slowly - a couple tablespoons at a time - helps the frosting to firm up without needing as much sugar.  I have yet to test this technique.)

Monday, March 21, 2011

Coffee Chiffon Cake with Nutella and Bananas


My friends invited David and I over for a crepe party on Pancake Day/Fat Tuesday/Mardi Gras.  Needless to say, I am a fan of any party involving a steady stream of fresh crepes and an extensive topping bar.  I had three crepes that night, playing around with combinations of berries, slivered almonds, lemon juice, powdered sugar, freshly whipped cream, and Nutella.  It was a delicious, delicious night.

It wasn't until two days later that I realized that I had forgotten to make my favorite: Nutella and bananas.

What had I been thinking?  This was a mistake that had to be rectified as soon as possible.  But not with crepes.  With cake.


I wanted to recreate the experience of eating Nutella and banana crepes, but in the form of a cake.  I chose to use thin layers of chiffon cake, for several reasons.  Chiffon cakes are a bit on the eggy side, and are usually not very sweet.  They're not fluffy or dense or crumbly or buttery - they're airy and light, which means that they can balance out the decadence of three layers of Nutella and bananas. 

This cake has a lot going on, so I opted not to frost or top the cake.  If you did want a bit of oomph, for presentation purposes, I think it would be wonderful with a light dusting of powdered sugar or swathed in barely-sweetened whipped cream...though if you want top it with another layer of Nutella and bananas, who am I to stop you?


Coffee Chiffon Cake with Nutella and Bananas
Chiffon cake recipe adapted from Bon Appetit, June 2002

1 1/2 cups cake flour
1 1/4 cups sugar
1 tablespoon baking powder
1/2 teaspoon salt
1/2 cup strong coffee, lukewarm
1/2 cup vegetable oil
5 large eggs, separated
1 tablespoon vanilla extract.

Nutella
4 bananas, sliced about 1/4 inch thick

Preheat the oven to 325 degrees Farenheit.  Butter and flour two 9-inch round cake pans.

Sift flour, 3/4 cup sugar, baking powder and salt into a large bowl.  Using an electric mixer, beat the coffee into the dry ingredients until just combined.  Beat in oil, egg yolks, and vanilla extract.

Using clean, dry beaters, beat egg whites in a medium bowl until soft peaks form.  Gradually add 1/2 cup sugar, beating until stiff but not dry.  Fold whites into batter in three additions.

Bake 30 minutes or until tester comes out clean.  Cool pans on wire cooling racks for ten minutes.  Cut around the cakes and turn out onto racks to cool completely.

Once the cakes are completely cooled, cut each cake in half with a serrated knife or cake cutter.  Place one layer on your serving plate.  Spread an even layer of Nutella onto the cake (make sure to go all the way to the edges) and top with bananas.  Put another layer of cake on top of it and repeat until your cake is finished.


Monday, March 14, 2011

Rolled Sugar Cookies


While I love experimenting with new flavors, I also think that classics are classics for a reason.  The gooey comfort of a chocolate chip cookie, the crisp buttery goodness of shortbreads, the creamy vanilla flavor of sugar cookies...yup, there are many reasons that we return to the classics again and again.


It's really quick to make the dough, and as it needs to be chilled ahead of time, it's really easy to do different parts during several pockets of precious free time.  For example, I spent 15 minutes making the dough one day, another 15 rolling and cutting it the next day, and another 10 minutes just popping it into the oven and baking it later that evening. 


This is probably my favorite sugar cookie recipe - it uses all butter (I hate shortening) and is really easy to roll out.   I think it has the perfect crisp-outside-chewy-inside texture - I'm not a fan of the cakey grocery store sugar cookies. I like it better after it's been sitting around for a couple of days, as it gets softer as time goes by.  I actually transcribed the recipe while watching Martha Stewart (which is weird, because I never watch it).  It's actually pretty entertaining, as her guest was just enamored by Martha and Martha wasn't really interested in her guest's stories of how much she loves her work.  I thought it was kind of funny.  I love Martha's recipes, but I can't be the only one who finds her a bit abrasive, right? 


Rolled Sugar Cookies
Adapted from Martha Stewart

2 cups flour
1/2 teaspoon baking powder
1/4 teaspoon salt
1/2 cup unsalted butter
1 cup sugar
1 egg
1/2 teaspoon vanilla
2 tablespoons milk

In a medium bowl, whisk together the flour, baking powder and salt.

In a large bowl, cream the butter and sugar.  Beat in the egg, vanilla, and milk.  Add the flour mixture and mix until thoroughly combined. 

Divide the dough into two disks, cover in plastic wrap, and chill for at least an hour or up to three days.

When ready to bake, preheat the oven to 350 degrees.

Flour your rolling area and rolling pin.  Roll the dough until 1/8 inch thick.  Cut out shapes with cookie cutters, occasionally dipping them in flour to avoid sticking.  Try to cut out as much as possible at one time, as the dough gets tougher each time you re-roll it.

Bake for about 10 minutes, until lightly golden.  Transfer to wire racks to cool.

Monday, March 7, 2011

Cascaron (Bitsu-Bitsu)


Cascaron is a Filipino dessert that my mom often made for get-togethers when I was growing up.  It's fairly simple to make, though I had a hard time figuring out how to make it for myself as my mom never uses a recipe, and most of her instructions to me were pretty vague.  For example:

Me: How much coconut milk am I supposed to add?
Mom: Oh, you know, you want to put enough, but you don't want to put too much.

Me: How long am I supposed to cook it?
Mom: Oh, I don't know - just be sure to take it out before it explodes.


I eventually figured out that the dough should be similar to cookie dough and that if you cook the dough in medium-high heat until the outsides are golden brown, the insides should be sufficiently cooked.  Thankfully, cascaron is pretty forgiving, and you don't need the exact measurements required in most baking.

So by now, you're probably wondering, "What the heck is cascaron?"  The best way I can explain them is to say that they are like fried coconut mochi balls.  And now you're probably wondering what mochi is.  Mochi is a Japanese cake, traditionally made by pounding rice into a paste and molding it, but can now be made with mochiko flour, which can be found in the Asian section of most grocery stores.  Most people have had it in the context of mochi ice cream, and if you live in Southern California, you've probably seen it as a topping option in most frozen yogurt shops.  It's hard to describe the texture, but I'd say it's denser than a marshmallow, but lighter than gummies, but even then, that doesn't fully capture the essence of mochi.  I guess you'll just have to try it for yourself!  :)


Cascaron

Vegetable oil
1 box mochiko flour (it will look like this)
1 13.5 oz. can coconut milk (I like Chaokoh brand best)
1/2 - 1 cup sweetened shredded coconut
2/3 cup light brown sugar
1/4 cup water

In a wok or wide pot, pour vegetable oil until it's about 3-4 inches deep.  Set the stove to medium-high heat.

Line a pan, tray, or large plate with paper towels

Combine the mochiko and shredded coconut in a large bowl.  Slowly add the coconut milk - you might not need the entire can - and mix until it's the consistency of cookie dough.  If you use the full 1 cup of coconut, you might need to add more liquid - in that case, add some water to the empty coconut milk can, swirl it around a bit so it picks up some of the leftover traces of milk, and slowly add more water to the dough.

Roll the dough into 1-inch balls and fry it in the oil until golden brown.  Don't overcrowd the cascaron - they expand as they cook.  The balls might start to crack, which is okay, just make sure to take them out before they explode ;)  When done, transfer to paper towels to cool.

In a small saucepan, combine the sugar and water.  Cook until it reaches the soft boil stage.  You can test whether it's ready by placing a drop of syrup in cold water - if it retains its shape and is soft, then it's ready.

Place the cascaron in a pan or tray lined with wax paper (I recommend a 9x13 pan).  Drizzle the syrup evenly over the cascaron, and gently stir them around so that they're fully coated.

Note: I tried to do this in a bowl, and it didn't work out to well - the syrup hardened before I could finish mixing them.

Let cool before eating.